

This post is the second in a four-part series about our trip to the Colorado Front Range. Check out our previous post about out first day trip from Denver to Colorado Springs.
On Friday, after two days of acclimatizing to the elevation in the Colorado Front Range, we decided to head up to Rocky Mountain National Park, located less than two hours from downtown Denver.
Ask any local about Rocky Mountain National Park, and their first piece of advice would be to go *very* early. This is sound advice: even on a weekday, many of the trailhead parking lots can get full well before 8AM, and there are frequent thunderstorms on summer afternoons. If you’re willing to hit the road early, the park offers great hikes to pristine mountain lakes, amazing lush meadows with rocky peaks rising above, and beautiful wildflowers growing in the higher elevations of the tundra.
Itinerary
- Leave Denver by 6AM and arrive at the Beaver Meadows Entrance Station at around 8AM.
- Park at the Bear Lake park-and-ride station and catch the shuttle to the Bear Lake Trailhead.
- Hike to Nypmh, Dream, and Emerald Lakes, and if you’re up to it, continue to the Loch and Alberta Falls, ending at the Glacier Gorge Trailhead.
- In the afternoon, take a scenic drive along the Trail Ridge Road.
- On your way back to Denver, check out the Chapel on the Rock in nearby Allenspark.
The Details
I had a bit of trouble sleeping, so after finding an espresso in Denver at 4:30AM on Friday morning (thank you Choice Market), we ate breakfast, packed up sandwiches for lunch, and left Denver just before 6AM. We didn’t hit much traffic on the way to the park, so it took us about two hours to get to the Beaver Meadows Entrance Station along highway 36. There were only a few cars ahead of us in line, so we made it into the park super quickly!
Note that on weekends or later on weekdays, the lines to get into the park can be very, very long. Thee are two different entrance stations on the eastern side of the park, so you can check out the webcams to give you an idea of the length of the line at each one. It’s possible, for example, that using the Fall River entrance station could save you some time even if it requires more driving in the park. Note that the right-most lane of both stations, which appears to be shorter than the rest, is for people who hold passes to this specific national park (which has an electronic verification system). If you hold an America the Beautiful Interagency Pass, like us, then you’ll have to wait in the main lines with everyone else.
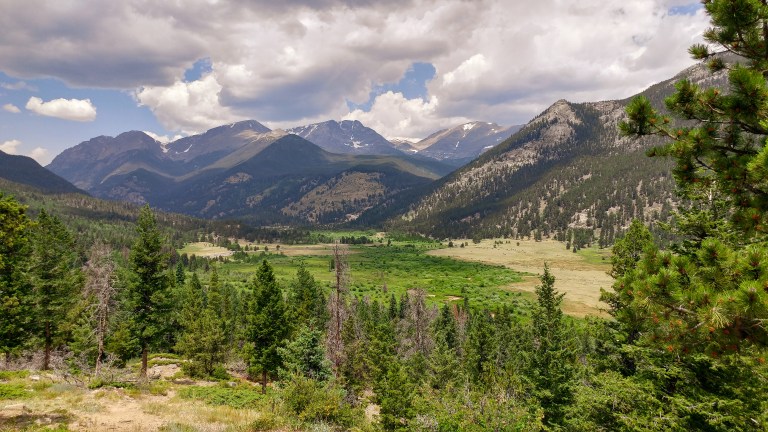
After entering the park, we immediately saw a sign telling us that the trailhead lots were full, as expected. We drove to the Bear Lake Park-and-Ride lot, passing some beautiful scenery in the Moraine Park area along the way.
The Park-and-Ride lot was pretty empty when we arrived, so we used the restroom and then hopped on the Bear Lake Shuttle (note that several shuttles leave from this hub, so check to make sure you’re getting on the right one).
Because we made such good time en route to the park, we decided to do a longer 7.4-mile shuttle hike to four mountain lakes and a waterfall through beautiful forests and canyons. There was a total of 1,434 ft of climbing on this route (the starting elevation is already above 9,000 ft), and it took us just under 4 hours to complete.
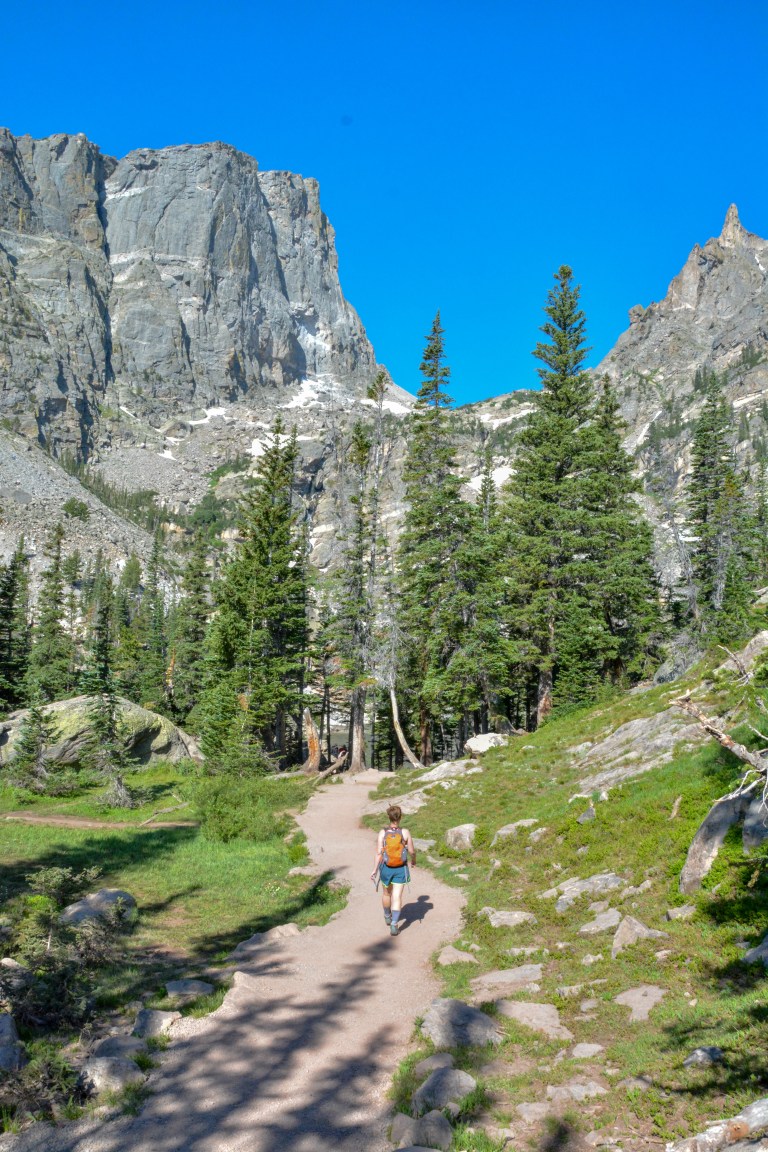
We started at the Bear Lake Trailhead, the final stop on the shuttle, and then set off towards Emerald Lake, the single most popular trail in the entire park. We decided to tackle this trail first because we’ve heard that it can get very busy as the day wears on. The first part of our hike was an uphill climb to three beautiful mountain lakes along Tyndall Creek framed by forests and granite peaks in the distance.
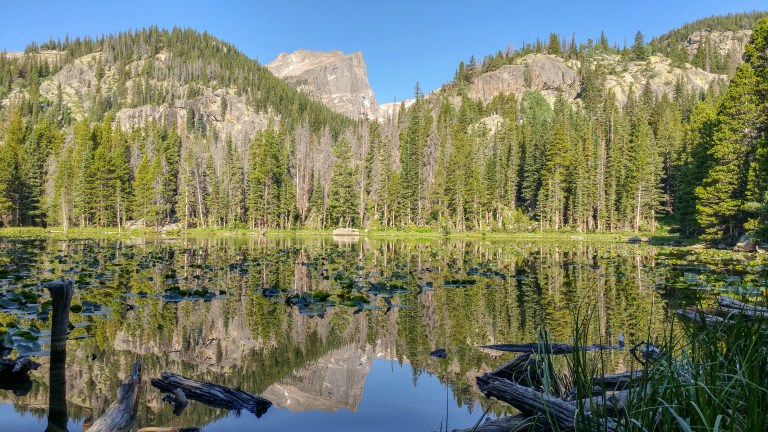
After a third of a mile, we arrived at Nymph Lake, a small lake covered by lily pads. The lake was beautifully still at this time, providing tremendous reflections of the granite wedge (Hallett Peak) and forests beyond filtered by the pads.
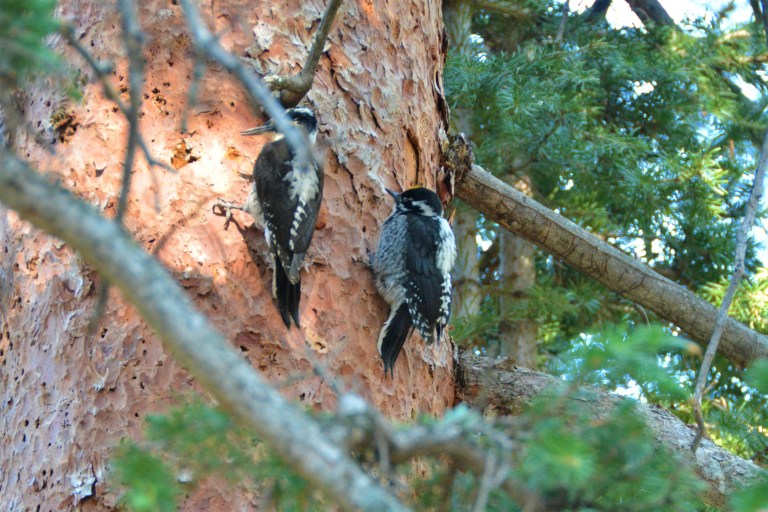
As we continued, through the forest, an astute hiker on the trail noticed a mother and young woodpecker searching for food in the trees and beckoned us to come watch. It was quite fun to observe the rapid, jerky motions of the bird as it searched for food, and then shuffle along the tree to feed the (big) baby.
After another couple of tenths of a mile, we walked past a long body of water called Dream Lake. When we first passed the lake, it was remarkably still and reflected the forest wonderfully, but with the wind and lots of people fishing here, the surface became a little more wavy when we returned later. We are glad we took some pictures when we did!

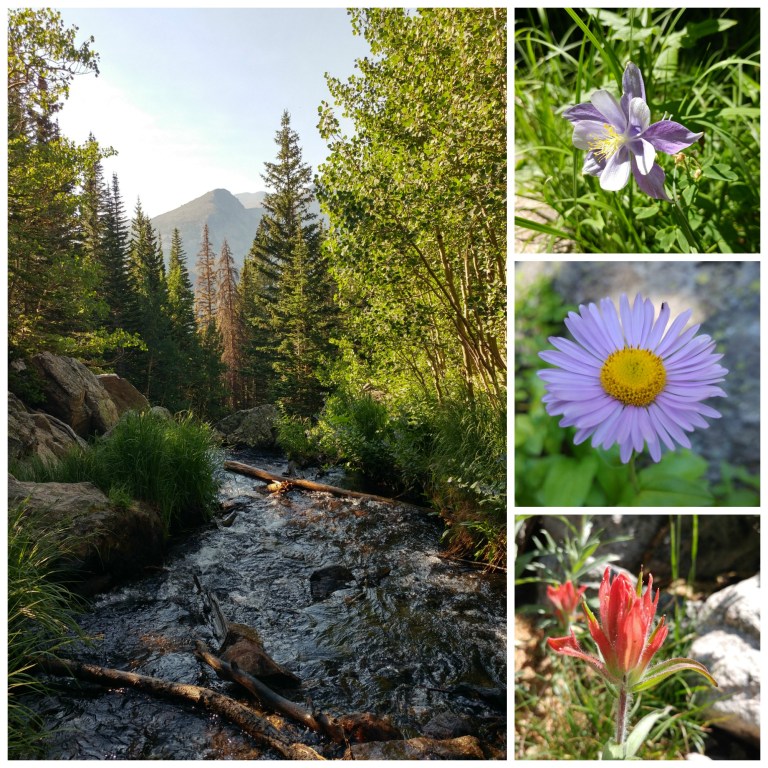
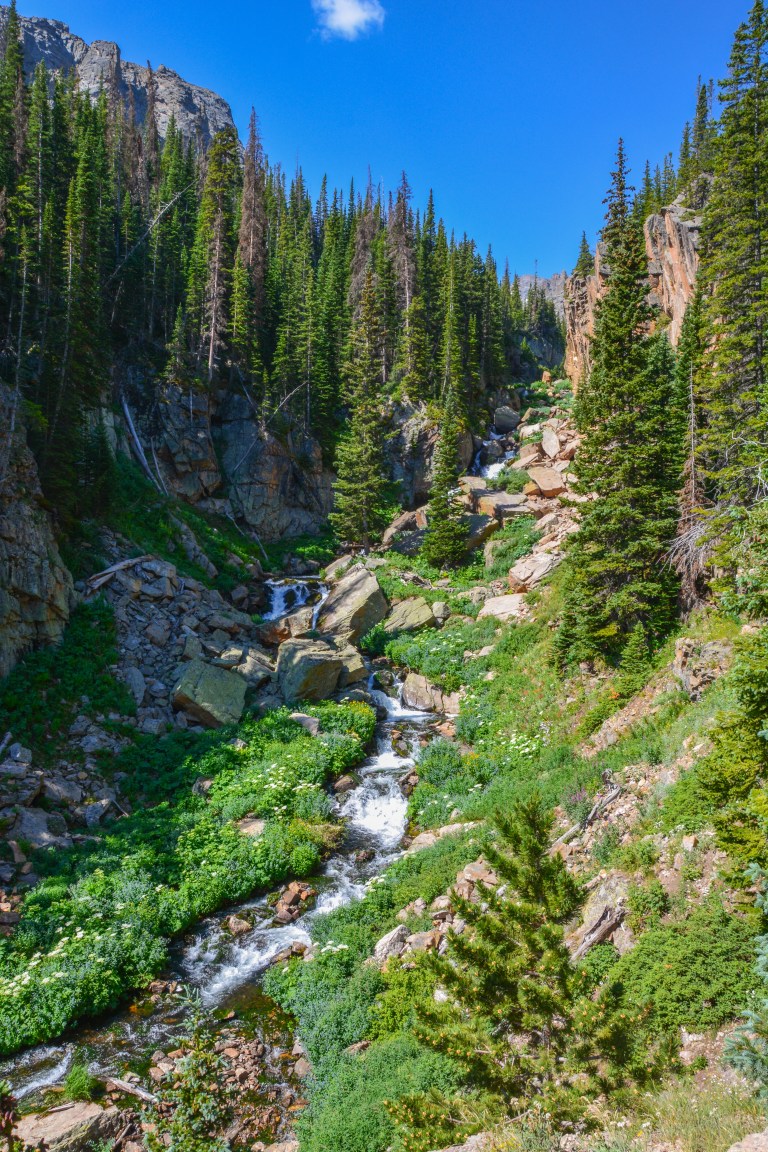
The banks of Tynadall Creek come into full view past Dream Lake, revealing loads of wildflowers and pretty cascades as we weaved across the footbridges along the path.
The trail climbs steeply after this point up to Emerald Lake. By peering out from some of the clearings in the forest, we caught a beautiful view of the lily pads on Nymph Lake surrounded by the forest from this section of the trail.
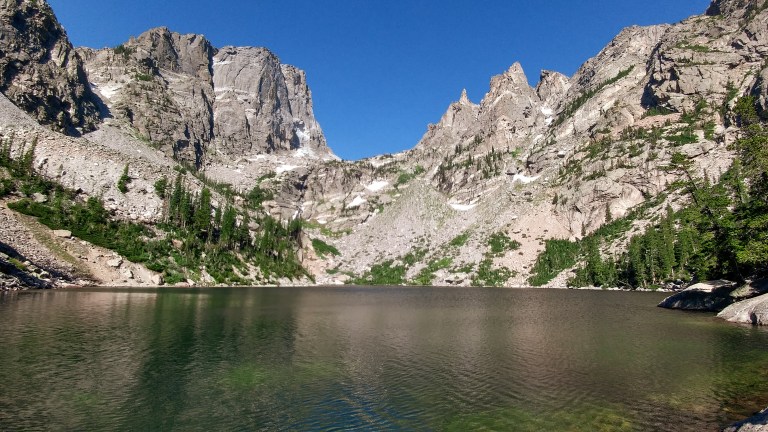
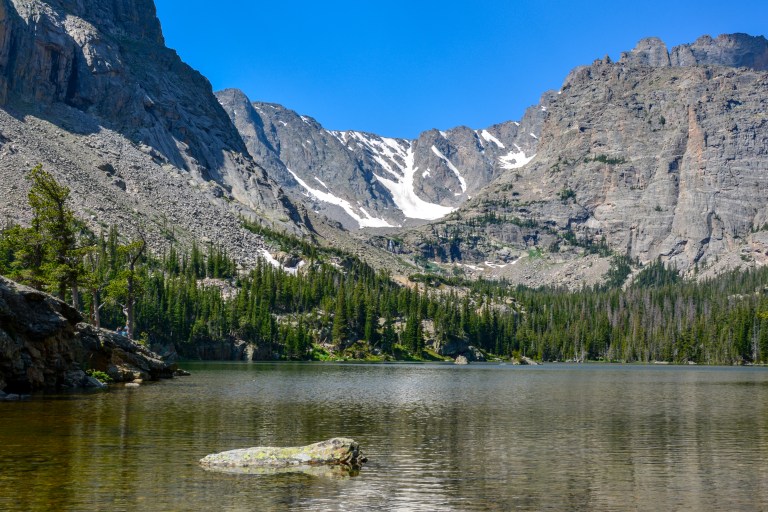
We reached Emerald Lake about 1.4 miles into our hike. Both from the shore of the lake and the trail leading up to it, Hallett Peak and Flattop Mountain form a very impressive backdrop.
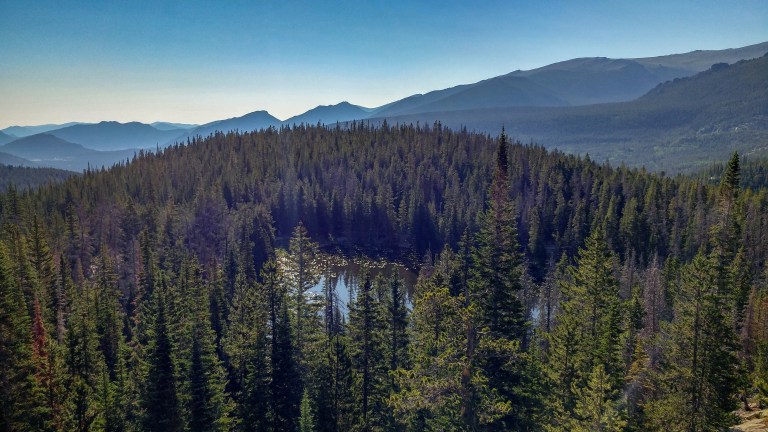
At this point, most people would turn around and return to the trailhead. Instead, we backtracked to just past Dream Lake and turned south at the trail junction there (towards Lake Haiyaha). As we continued to ascend the trail, we caught a view of the lily pads on Nymph Lake again from above (giving us a sense of how far we had climbed); it was beautiful to see the lake in context, surrounded by the dense forest and the hazy hilltops in the distance.
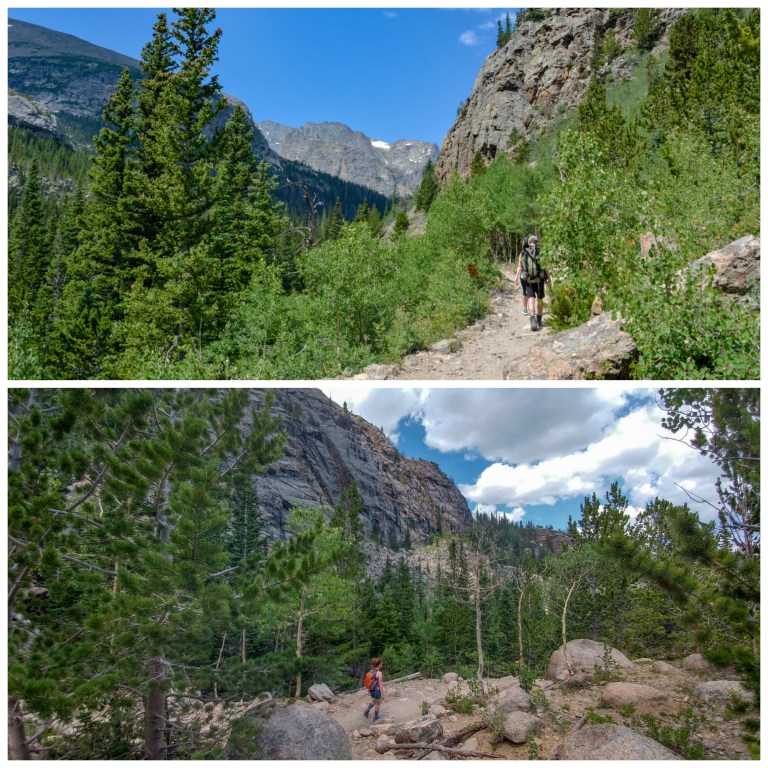
A park ranger told us that we could tack on a trip to Lake Haiyaha along this trail, but that reaching the lake itself would require some bouldering and scrambling, which we weren’t feeling up to. So we continued along some steep up and down through the forest until we came to the junction with the Glacier Gorge Trail and followed it upwards towards the Loch.
Although not mentioned in many of the trail guides, perhaps one of the best parts of this trail is walking parallel to the Icy Brook, which, despite its name, is quite powerful! Just before reaching the Loch, there is an incredible set of cascades that is visible from the extreme left edge of the trail. Although no individual fall was particularly steep, the overall length of the waterway surrounded by greenery was very impressive.
At about mile 4.5, we finally arrived at the Loch. We continued along the trail for just a few steps to get a good view of the Taylor Glacier and the Taylor Peak behind it.
It possible to go past this point and up to Glass Lake and Black Lake, but this requires a very significant rock climb on the rocks beside Timberline Falls. Instead, we climbed back down the Glacier Gorge trail from this point back to the Glacier Gorge Trailhead (i.e. not returning to Dream Lake). The entire length of the Glacier Gorge trail past the junction is amazing, with large boulders over the trail, a deep canyon beside the trail, and giant granite faces on the other side of Glacier Creek.
At mile 6.6, we came to Alberta Falls, a 30 foot waterfall, perhaps the most impressive one we saw on this trip because of the rate at which it gushes.

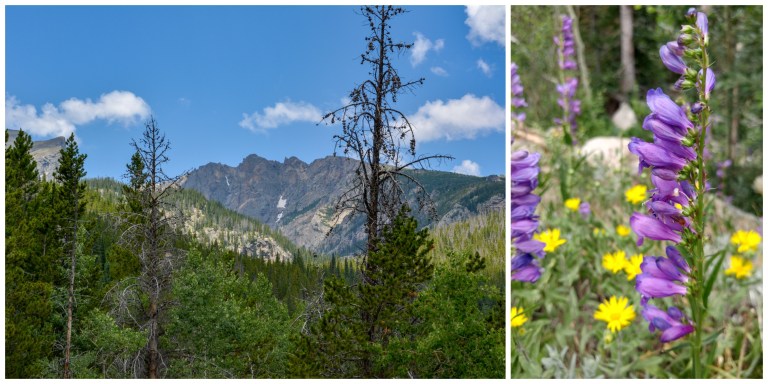
We terminated at Glacier Gorge Trailhead instead of at Bear Lake Trailhead to cut some distance and time off the return trip. Very close to the trailhead area, we admired the beautiful clusters of wildflowers and the mountain peaks in the distance as we waited for the shuttle to take us back to our car.
The timing of the hike, at just under four hours, worked out perfectly because the sky opened up and started raining on us just as we were stepping back into our car! With the weather being more dicey, we decided to spend the rest of the afternoon doing a scenic drive through the park up to the Alpine Visitor Center.
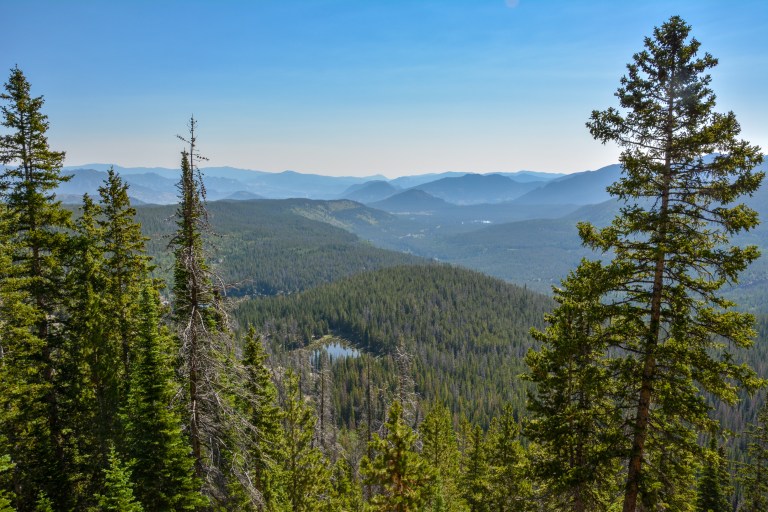
If you have two days to spend in the park, we’d actually recommend leaving the park in the afternoon and coming back the next morning to do the scenic drive. As we discovered, the traffic on the roads through the park can be quite dense in the afternoon, making it difficult to stop at all the pullouts and even at the visitor center itself! However, we had only budgeted one day to spend here, so we bit the bullet and did the drive. The views from the roads and the pullouts were indeed spectacular and provided a great perspective on the changes in vegetation at different elevations.

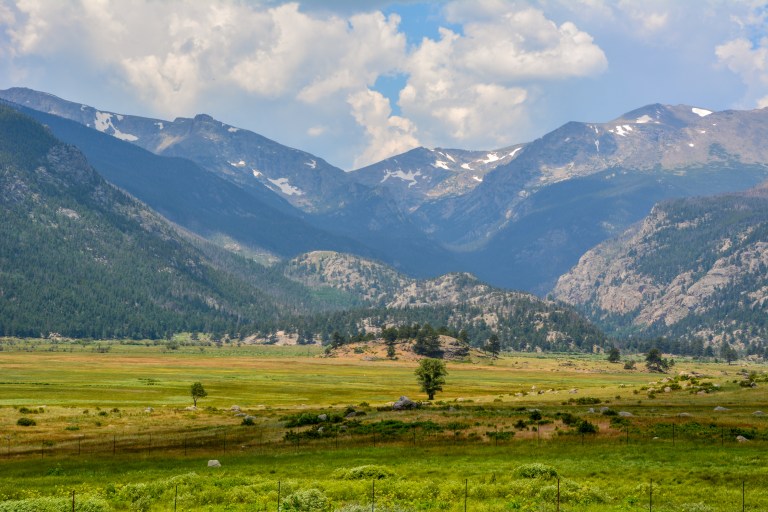
Our first stop on our drive was at the Horseshoe Park lookout along highway 34. The park is a beautiful meadow framed by mountain peaks. Each of the viewpoints along the highway give a slightly different perspective of the park.
We also made a quick stop at Sheep Lakes, where bighorn sheep sometimes congregate near natural salt licks in the morning and early afternoon. There were no sheep out when we visited; perhaps they sensed the bad weather and were taking shelter :).
There are two possible paths to take to get up to the Alpine Visitor Center: Old Fall River Road, a single-lane, one-way dirt road which was the historical mountain pass through the park, and Trail Ridge Road, the newer road that has one lane in each direction. Online, most people suggested doing a loop, i.e. taking Old Fall River Road up to the visitor center and then taking Trail Ridge Road down. We followed this advice, and in retrospect we’d actually recommend taking the Trail Ridge Road both ways. The main attraction on the one-way section of Old Fall River Road are Chasm Falls, and since we had already seen some pretty nice waterfalls in the morning, the downsides of driving Fall River road didn’t seem worth it. Fall River Road is slow, not particularly fun to drive, and lacks the sweeping views that you can experience on the Trail Ridge Road.
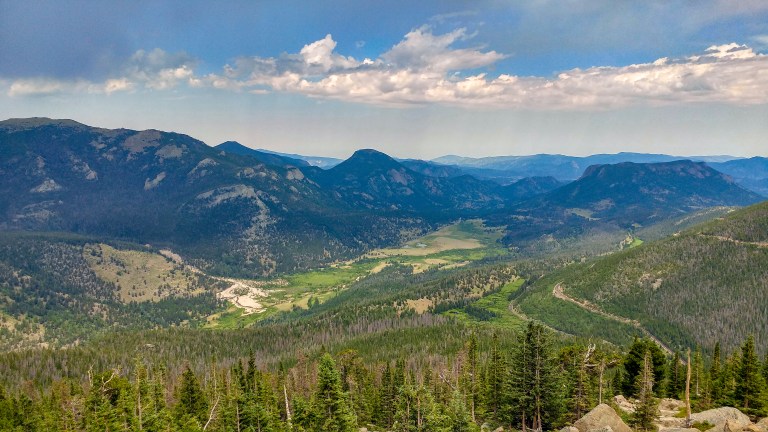
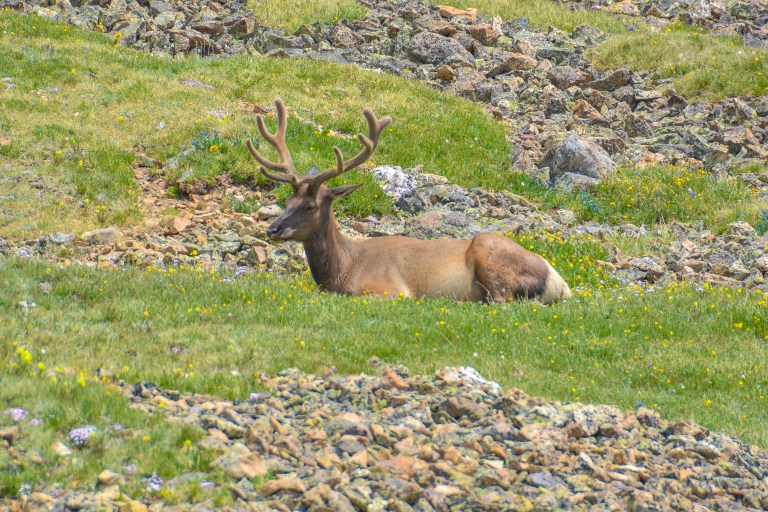
There are also more opportunities to spot wildlife along Trail Ridge Road since the views are not as enclosed. On our drive, an elk decided to rest in the rock fields above the highway, posing for the perfect picture.
If you do drive Trail Ridge Road both ways, we’d recommend stopping as you can at the pullouts if you think you’ll have a chance to park. Here is an incomplete list of pull-outs and stops on the way to Alpine Visitor center. There are opportunities for short hikes at many of these points, if you feel so inclined:
- Many Parks Viewpoint
- Rainbow Curves Overlook
- Rock Cut
- Gore Range Overlook
- Alpine Visitor Center
Each of the viewpoints shows off the beautiful landscapes carved by weather and glacier activity. We were also lucky to visit during the very short 6-week growing season in the tundra, so the normally barren terrain was carpeted with tiny white, yellow, and purple wildflowers.

In total, with the traffic and stops, it took us about 3 hours to do our scenic drive. We exited the park the same way we came in, at Beaver Meadows, but instead of driving on the quickest road back to Denver, we drove a short distance along the scenic Peak-to-Peak byway to see the Chapel on the Rock, a tiny historic church in Allenspark, CO. The chapel was closed for a wedding when we arrived, but the beautiful stone exterior of the church framed by the Rocky Mountains was beautiful to behold from the roadway.

A Note on Safety: Elevated Risk
Much of the scenery at Rocky Mountain National Park is at substantial elevation. For example, the Bear Lake hiking area is around 9,000 feet, while the Alpine Visitor Center is up at 12,000 feet.
At these altitudes, there is less atmosphere above you, so the intensity of UV light is stronger, and the sun seems brighter. It’s very important to cover up, apply and reapply sunscreen, and to wear sunglasses if you’re sensitive to light.
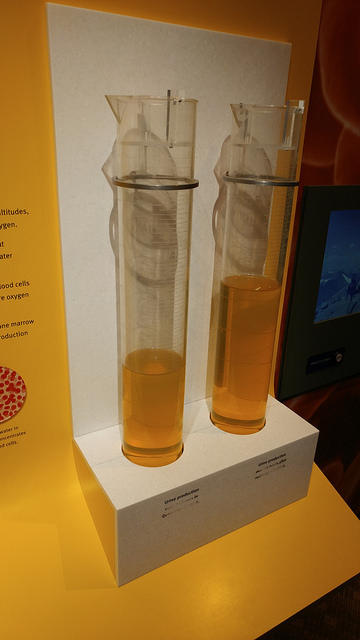
Beyond that, your sweat evaporates more easily and you tend to breathe faster, resulting in dehydration. Also, the partial pressure of oxygen is 25% lower than it is at sea level. Until your body can produce more red blood cells or alter your haemoglobin to increase the oxygen uptake in the rarefied air (which can take days to weeks), it first squeezes the red blood cells you already have into a smaller volume. To do this, it extracts water from the bloodstream to make your blood thicker. Not only are you losing water to sweat and in your breath from exertion, but your body is actually fighting against you to keep water out of your bloodstream. This also means that the classic signal for dehydration, dark urine, isn’t a good signal here. In fact, we saw an exhibit at the Denver Museum of Science that shows that urine production can actually increase at higher elevation, even as you are becoming dehydrated.
We definitely started to experience the effects of altitude during our visit to the park, including feeling generally unwell and having a headache that wouldn’t go away easily with ibuprofen. When you’re hiking at elevation, it’s really important to exert yourself less than you would normally, drink water and replenish your electrolytes diligently, eat snacks with carbohydrates instead of protein (since protein takes more water to digest), and to have an alternate route or rest stop planned in case you start to feel unwell as you’re hiking or driving.
That concludes our one-day visit to Rocky Mountain National Park! Stay tuned for the recap of our next day trip to Boulder!

You may want to correct this misinformation: “There are two possible paths to take to get up to the Alpine Visitor Center: highway 34 (Fall River Road), a single-lane, one-way dirt road which was the historical mountain pass through the park, and highway 36 (Trail Ridge Road), the newer road that has one lane in each direction. ”
Hwy 34 is Trail Ridge Road (not 36). The one way dirt road is OLD Fall River Road. It is not a designated highway. Please check a map.
LikeLike
Thanks, Barb! Updated!
LikeLike