

In the Spring, as the temperatures become less extreme and the wildflowers bloom, the hordes descend on California’s most popular desert parks, like Death Valley, Joshua Tree, and Anza Borrego. But only an hour and a half from Las Vegas is something of a hidden gem, the Mojave National Preserve. Vijay and his friend Colan explored the preserve over a weekend in late March.
Mojave National Preserve offers fewer facilities than a full-fledged national park, i.e. rougher roads, fewer bathrooms, and less trail maintenance, and this seems to be enough to keep the crowds away. Even on the most popular trails, we usually only saw a handful of other people during our visit while experiencing amazing rocky scenery, towering sand dunes, dense Joshua Tree forests, and incredible stargazing opportunities.
Weekend Itinerary
For car campers like us, the Mojave Desert was perfect for a weekend visit with one overnight in the park.
Day 1
- Drive to the Mojave Preserve from Las Vegas, stopping for firewood and water along the way, and find a campsite [~1hr 45 min drive].
- After setting up camp, head over to the Mojave Desert Lava Tube to see beautiful light rays near solar noon, stopping at the Kelso Depot Visitor Center for a pit stop and to refill on water. [1hr 30 min drive, 30-45 minutes for hiking the short trail and taking lots of pictures].
- Backtrack to Kelbaker Road and hike the rim of the youngest cinder cone in the Cima Volcanic Field [20 min drive, 1.5 hours to hike the 3.7 mile trail around the rim].
- Head back towards camp. If you have time before dark, hike the Teutonia Peak Trail or watch the sunset from your campsite [~1 hour drive, 1.5 hours to hike the 2.9 mile trail to Teutonia Peak].
- Pop out of your tent overnight to see the stars experience some of the best dark skies in the region.
Day 2
- After breakfast and warming up by the fire, tear down camp and head over to Providence Mountains State Recreation Area to get a tour of Mitchell Caverns. [1 hour drive, and about 2.5 hours for personal exploration and the guided tour program].
- Backtrack to Hole-in-the-Wall Information Center for a picnic lunch, and then hike the famous Rings Loop Trail clockwise [30 minute drive, 1 hour for hiking the 1.4 mile trail].
- Head over to the Kelso Dunes in the late afternoon, and climb to the tallest point in the field for panoramic views of the sand piles amidst the mountains [1hr15min drive, 1.5 hours for hiking the 2.7 mile trail].
- Head back to Las Vegas to decompress after your exciting desert adventure [2 hour drive].
The park is huge, and there is lots more to discover, including historic mining sites, back country canyon hikes, and accessible mountain peaks, but this itinerary gave us an opportunity to see many of the park’s beautiful sites without venturing too far off the main roads.
Resources
The park is so big that it was a little bit overwhelming to decide what to do on our short trip. The best resource we found was Professor Michel Digonnet’s thorough book, Hiking the Mojave Desert, which describes the geology and history of the region along with providing detailed hike descriptions. Fellow bloggers Stav (Stav Is Lost) and Dan (Capture the Atlas) have great online resources, too.
If you are looking for conditions in the park during your visit, here are links to the weather and to a webcam. Note that the weather at lower elevations can be substantially warmer than the conditions reported here. Many of the trails are very exposed, so only hike if the temperatures are reasonable, you’re feeling well, and you have plenty of water and some snacks.
Getting There and Getting Around
Mojave National Preserve is on the California-Nevada border. The closest airport to the preserve is Las Vegas McCarran (LAS), which is about a 2 hour drive from the park. You can also drive from Los Angeles (3.5 hours) or San Diego (4.5 hours).
Having a higher clearance vehicle allows you to see much more of the park during your trip. Even some developed roads, like the one to the Lava Tube and the route to the Mid Hills Campground, were sandy, rocky, and rough. Many rental car agencies can’t guarantee a 4×4 or AWD vehicle, so if you are renting one at Las Vegas airport be sure to ask and select an appropriate car. Even if you have a good car, we saw at least two people changing flat tires. On rough roads, keep your speed below 15 mph and try to navigate through the least rough path available even if it is less fun!
There is also no gas available in the park, but there are stations all around it (in Nipton and Baker, for example, which are two natural entrances if you are coming from Las Vegas). The itinerary proposed here was about 400 miles, so keep that in mind and be sure to include fuel stops if you need them.
Camping
There are no reservable campsites in the park, and also no firewood for sale. We brought in our own water and firewood along with our standard camping gear to have the maximum flexibility in selecting a site. We also discovered that the wind is pretty fierce at night, so we’d recommend bringing a warm sleeping bag (rating of 25°F or lower, we’d say) and bundle up! If you want to stay overnight, which we’d highly recommend to see the stars, there are two options for camping.
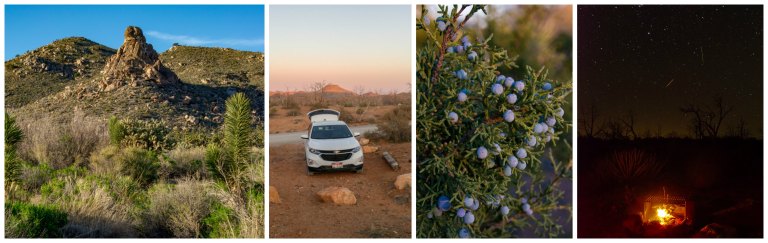
- The park allows roadside camping anywhere that has been “traditionally been used for that purpose,” i.e. anywhere with a fire ring. Some of these locations are detailed here on the park website. These sites are free, but they have no bathrooms and they are first-come first-served. The sites near Sunrise Rock and Kessler Peak are some of the closest to Las Vegas, and they were almost totally empty when we arrived mid-morning on Saturday. We heard from rangers that the sites near Kelso Dunes are much harder to grab (these are also some of the only roadside sites within a mile or so of a bathroom). At roadside sites, you are also not near rangers or camp hosts, and so you have little recourse if you need help. We actually claimed a beautiful campsite near Kessler Peak (photo above) early in the day that was well-sheltered and in the middle of a beautiful Joshua Tree forest. However, we returned to our campsite later in the day and found another group set up there despite the large pile of our stuff sitting there! The new group refused to leave and was so belligerent that we couldn’t bear the thought of sharing with them. Although we were very angry, we had little recourse but to pack up and leave since there was no formal reservation system or park ranger available to resolve the dispute. Although we wouldn’t let this negative experience dissuade you from roadside camping, we would caution that you should try to spread out over your site and even leave a note stating your dates of stay or else be prepared to share your site with another group.
- After having to leave our first camp site, we tried our luck with the park’s developed campgrounds. These are also first-come, first-served, but have formal sign-up procedures and charge $12 a night. The Hole-in-the-Wall campground is right near some of the park’s main attractions and has water, trash receptacles, fire rings, and toilets, but it is also the most popular and can be totally full by Friday afternoon according to park rangers. Mid Hills campground (photos above), which is at a higher elevation along a rough stretch of road, deters many RVs and even many car campers. At 6:30PM on a Saturday, there were still many spots left. Mid Hills Campground has no water, but does have fire rings and pit toilets. Many sites feel very private and shady because of the surrounding juniper trees. We’d strongly recommend grabbing one of the first sites in the loop as you enter (we stayed at site 8), as these have some view of the south-eastern sky, where the galactic core of the milky way comes into view and where the sunsets against the rocks are amazing.
Day 1 – Volcanic Field
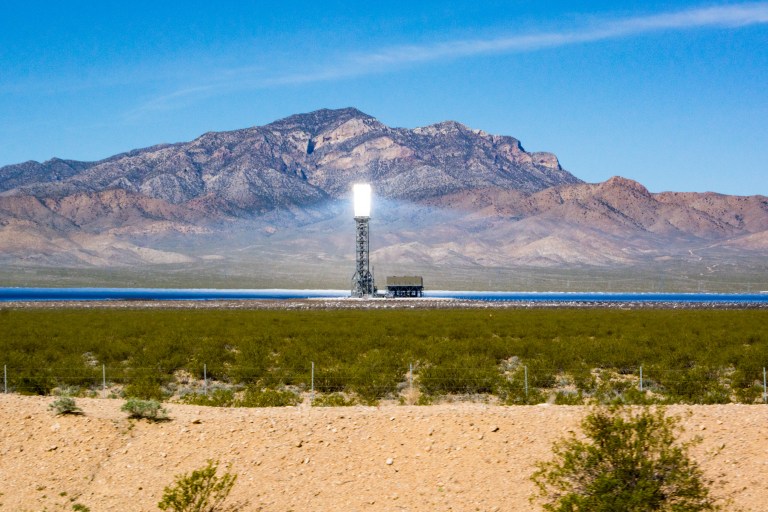
We arrived in Las Vegas pretty early on a Saturday morning, and after picking up some groceries and supplies, we headed straight over to the preserve. En route on I-15, we got an amazing view of the Ivanpah Solar Electric Generating System, the world’s largest Solar Thermal Power Plant. The facility uses light focused by a huge array of mirrors to heat up a “power tower” and then converts this heat to electricity. The result is an amazingly bright tower that shines like a beacon in the desert. There are actually three of these towers visible from the highway.
We spent our first day in the park exploring the Cima Volcanic Field, whose features were created by lava flows over the past 7.5 million years! We observed the most famous feature of this area, the Cima Dome, a hemispherical mound that is clearly visible as you exit I-15 and enter the park on Cima Road. The curvature of the dome isn’t done justice in any of the photos we took, so we’ll leave it to you to see if for yourselves :).
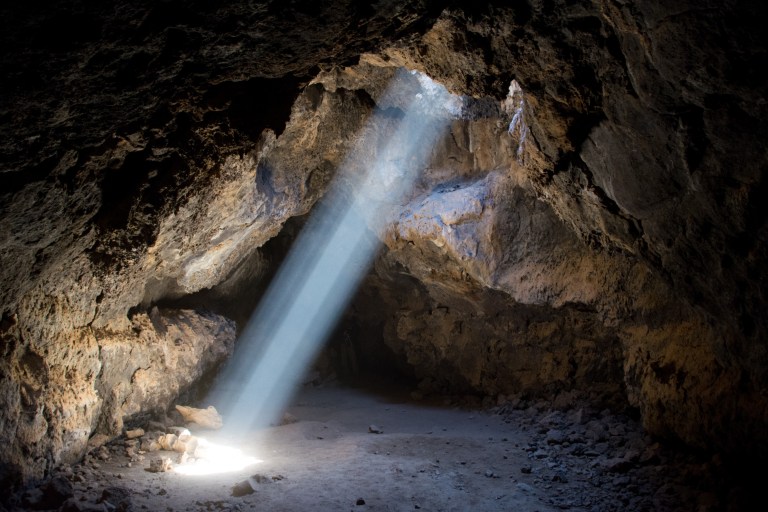
Because campsites can fill up quickly, the first order of business was to find a campsite and get it set up (see above section on camping). The national weather service had warned that winds in the park can be quite strong in the afternoon, so we tried to make sure everything was secure before we headed out again. Our destination was the Mojave Desert Lava Tube. As lava flowed through the area during an eruption, it cooled and solidified along the edges of the flow while staying molten and flowing through the middle. The result is a natural tunnel formed by the flowing lava.
To get there, from the Cima area, we took the Kelso-Cima Road past the Kelso Depot Visitor Center, one of the only places with flush toilets at potable water in the park (the visitor center at Hole-in-the-Wall is the other, and it was closed during our visit for renovations). After our pitstop, we headed down the Kelbaker Road and then turned on to the Aiken Mine Road (rough and dusty), following the signs that took us to the Mojave Desert Lava Tube Parking Lot.
Note that the Lava Tube isn’t that far from the lot along the main trail, and many visitors, including us, almost missed the turnoff for the tube! We found that the walking directions on Google Maps were very accurate, and we also saw some unmarked poles to the right of the main trail that lead up to the tube. We knew we were in the right place when we saw the stairs installed by the Park Service to allow access to the tube.

The darkened area just down the stairs is actually a partial tunnel collapse; we had to duck down low and use our headlamps to navigate around it. On the other side of this rock pile was a sight even more awe-inspiring than pictures we had seen online. Around solar noon (the time at which the sun is highest in the sky), light from natural skylights in the ceiling of the tube beams down into the tunnel, scattering off dust in the air. The result is a display of beautiful light beams framed by the tunnel.
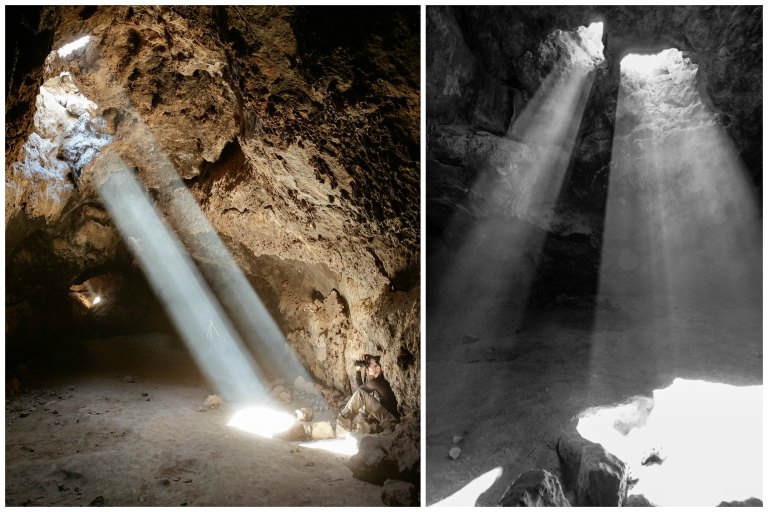
We stayed down here for about a half hour taking photos, and we had the tunnel all to ourselves for at least half of that time. Just before we left (about 45 minutes after solar noon), the main shaft of light in the tube actually separated into two beams. Colan got a unique perspective by kneeling down and looking up along the beams of the light. Besides these two light shafts, there is a third mini-shaft towards the back of the tunnel (visible on the left in the photo below). The small cave underneath that mini shaft did not lead anywhere except to a dusty dead-end.
While you’re in the tube, and if you’re traveling with kids, do be careful not to disturb the soil or dig too much: as mice that travel through the tube, they can potentially leave droppings that carry hantavirus, a serious respiratory illness. Also, if you are sensitive to dust, perhaps consider taking an N95 or other particle mask down with you.
After we had finished up at the lava tube, we decided to explore the cinder cone area in more depth. We backtracked to the Kelbaker Road and drove 2 miles further northwest to a pullout that had a fire ring (the area is not well marked, so use the map pin above for some guidance). From here, we set out across the wash and along the trail to the youngest cinder cone (~3.7 miles of hiking, round-trip), a volcano which erupted about 10,000 years ago.
The trail takes you along the lava field around the periphery of the cinder cone, with lots of colorful rocks and wildflowers below your feet.

After about 1.3 miles, you should come a junction. On your left, you’ll see a clear path up the side of the cone. Do be careful as you go up and down the steep slope of the cone as the rocky terrain is loose and quite slippery!
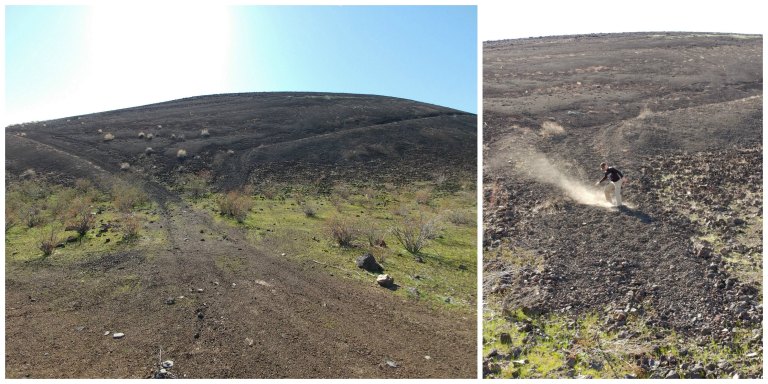
Perhaps the most defining feature of the hike is to see the lava flow from the rim. The youngest crater developed a fissure one one side, causing a giant tail of lava to flow out. The stark black rock from this flow lies in beautiful contrast to the rusty iron rocks of the cones, the blue skies, and the white outlines of the salt flats in the distance.

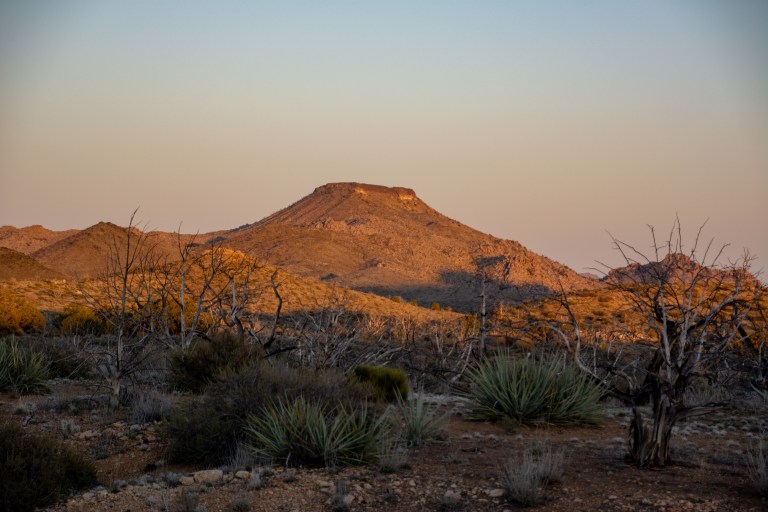
We made our way back to the car by retracing our steps and then made a final pit stop at Kelso Depot for a water refill before heading back to camp. We ran out of time on this day but would have loved to bag the 3-mile hike to Teutonia Peak, one of the most popular trails in the park, before sunset. As a nice consolation prize, we got to experience the sun setting over Table Mesa from our campsite at Mid Hills.
We visited the Mojave Preserve a few days before the April new moon, and at this time, there was a two-hour window between ~2:30-4:30AM for observing the galactic core of the Milky Way (the brightest, densest part of our galaxy). The preserve is an ideal location for stargazing; even though it is only 1.5 hours from Las Vegas, the humidity is low, the elevation is moderately high, resulting in less scattering and great dark skies.
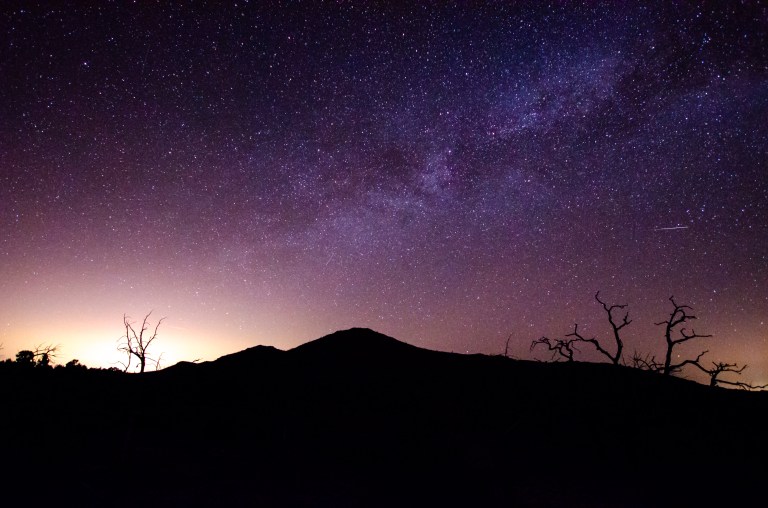
We used Stellarium to plan out our photos before we left home to get an idea of where to look in the sky. The core rises in the southern sky in the general direction of the constellation Sagittarius and moves up and east until it is obscured by light from the rising moon. When we popped out of our tent at 3AM, it was totally obvious where to look :). Using the SLR camera settings and focusing tricks Jennifer Wu recommends in her book excellent book, Night Sky, we set up a camera on a tripod and started taking pictures in an easterly direction. We found the best pictures came out by using ISO 6400, setting a 20-second exposure, and manually focussing on the brightest star using the live view mode on the camera. We adjusted the photo in Adobe Lightroom later to remove some noise and set the white balance. We shot for about 45 minutes, after which our hands were too cold to keep going :). The photos turned out really well, with a beautiful sky framed by the barren trees and rocky peaks of the desert. Enjoying the dark skies of the park was probably the highlight of our trip.

Day 2 – Caves, Canyons, and Dunes
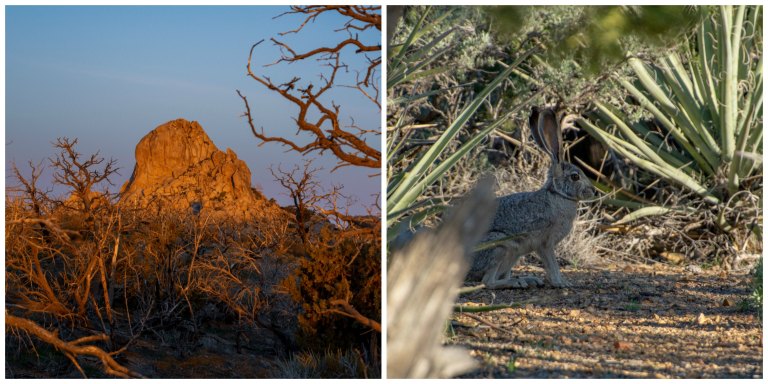
We slept for another couple of hours after our overnight photo shoot and woke up as the sun was rising against the rocks to our west. A rabbit also hopped through our campsite as we made breakfast and got ready for the day.
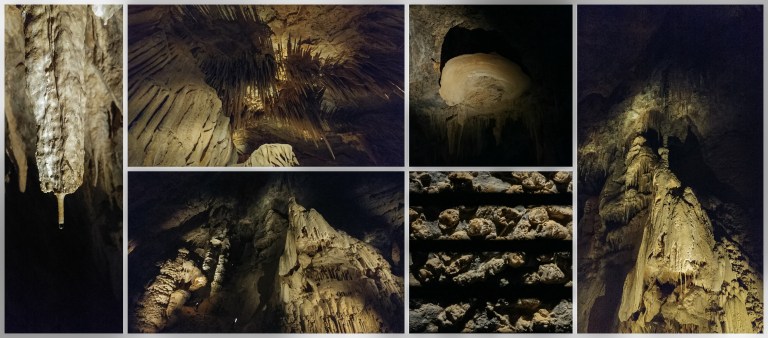
Recently, the Providence Mountains State Recreation Area, a California State Park within the National Preserve, has partially reopened to visitors after being closed for 7 years for major infrastructure upgrades. The main feature of the park is Mitchell Caverns, an interesting limestone cave system that can be a welcome escape from the desert heat. The Mitchell family set up the caverns in 1934 as a roadside attraction off of Historic Route 66. The caves are only accessible by guided tour on Friday, Saturday, Sunday, and holiday Mondays. Tours become available about three months in advance and can only be reserved by phone on Mondays. The reservations for the tours fill up almost immediately; however, you can always try your luck by coming to the park early and getting on a waiting list in case there are no-shows or cancellations. This is what we decided to do. We packed up camp and made it to the visitor center at Providence Mountains by around 9:30AM, where we snagged the last two spots for the 11AM tour!
While we waited for our tour to begin, we took a stroll along the 0.5 mile Mary Beal Nature Trail, which winds around the hillside near the visitor center.
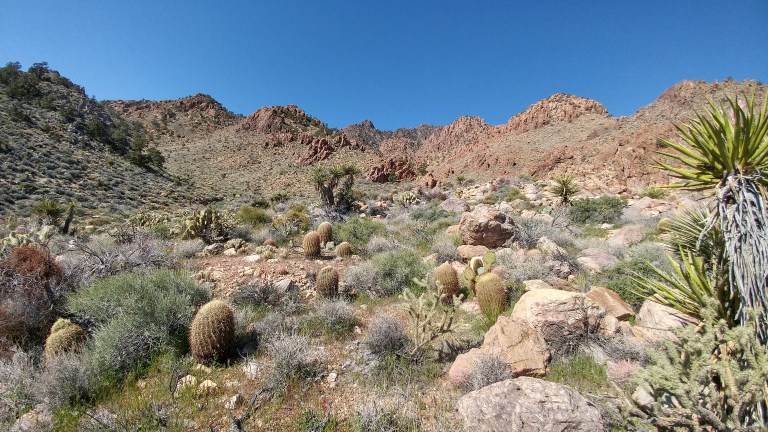
In the early spring, we saw beautiful blooming Joshua Trees, Yucca, and cacti set against the mountains as well as some caterpillars preparing their cocoons.

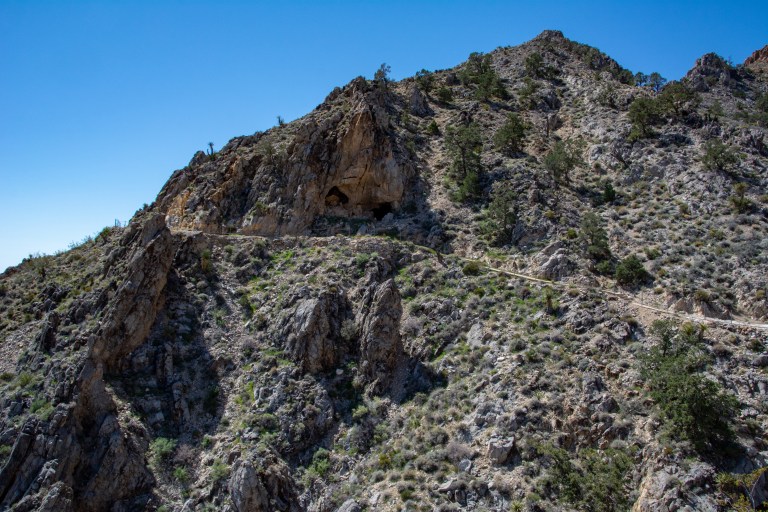
At 11AM, our tour group gathered at the visitor center and made our way to the opening of the caverns with our guide. On this 1 mile trail, there were dramatic views into the desert valley below. Although the sun was beating down on us, it was very windy up here, so it felt a little chilly!
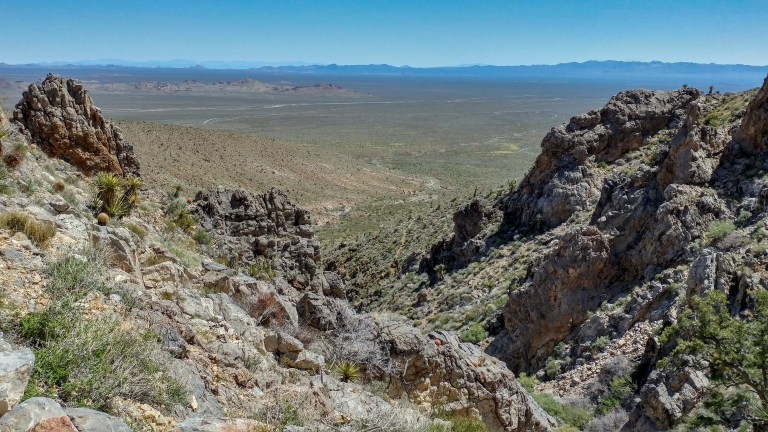
From the trail, you could even see outlines of fossils that showed how this part of the mountain used to lie at the bottom of the ocean and how the cave system used to extend across the chasm between the hills.
We also got our first glimpse of “the nose” – a pair of holes that forms the entrance to the caverns.
Once inside, we were treated to all kinds of delights in two cave systems: one that is almost dead, where almost no formations are currently active, and a second system that was much more humid and continuing to develop. Between the two, we saw trickles of water from stalactites, fused stalactites and stalagmites called columns, shields, cave mushrooms and bacon, and even a bat! The tour took about two hours, end-to-end.
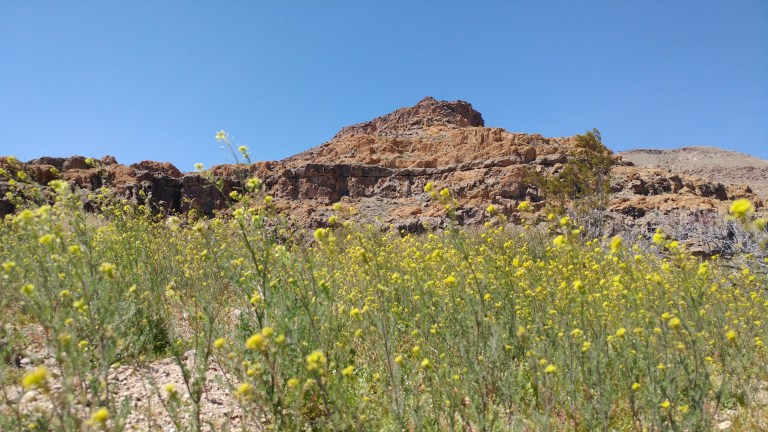
After we had finished up at the caverns, we backtracked 25 minutes up the road to the Hole-in-the-Wall day use area for a late picnic lunch – there was no water available, but there were pit toilets. There were lots of beautiful yellow wildflowers blooming in front on Banshee Peak, which was also the central feature of our next hike.
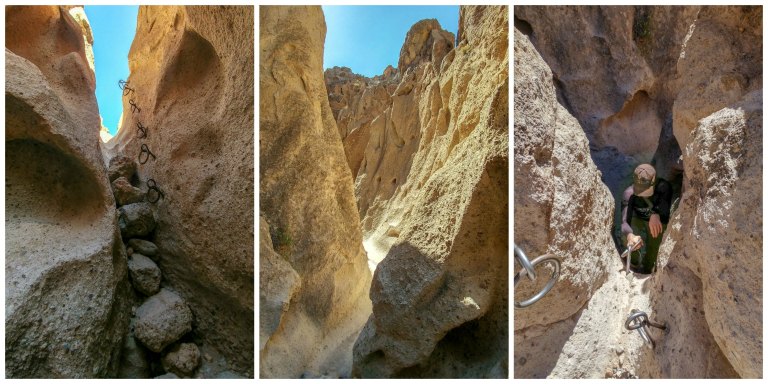
The Rings Trail is a 1.3 mile loop trail through Banshee Canyon. Some sections of the trail would ordinarily require some rock climbing to get across, but two sets of metal rings have been installed for these sections. Even so, the terrain is pretty uneven and significant scrambling is still required, especially on the home stretch of the trail after the last set of rings.
After attempting the trail both ways, we decided that taking the trail clockwise was the best option for us, allowing us to walk up the rings instead of down them, which made it easier to see where your hands and feet are supposed to go. Colan scraped his hand a little as he made his way up the rings, so we would recommend wearing gloves to prevent abrasions from the sharp rocks.
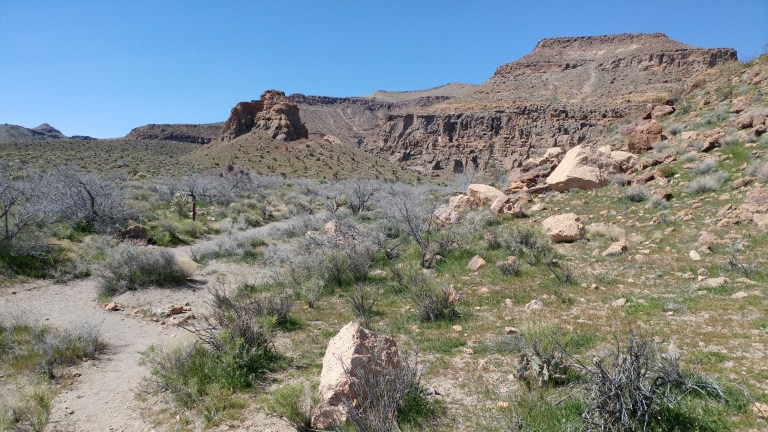
If you want to take the trail clockwise, avoid the temptation to take the Rings Loop trail from the day use and picnic area. Instead, walk to the left and back towards the visitor center. You should be able to see a trail from there that keeps Banshee peak on your right as you walk parallel to a desert wash.
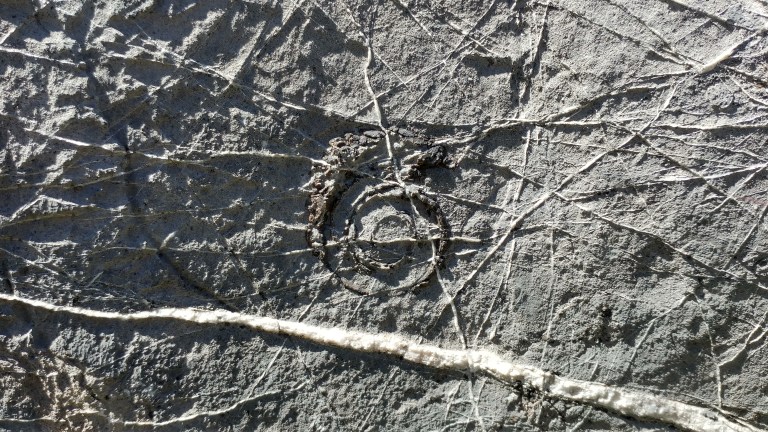
One feature to look out for along this section of the trail is a set of old petroglyphs carved into a pair of rocks. There is a Parks Service sign next to the rocks, so they are pretty easy to spot.

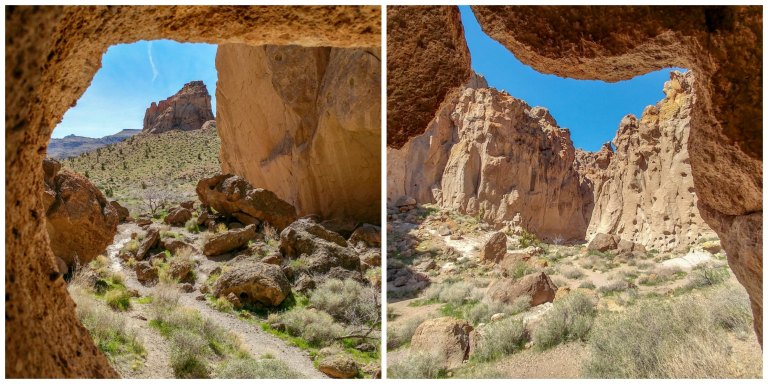
As you round your way into the narrow canyon, you’ll see a series of holes carved by the wind and rocks, many of which make homes for birds and other wildlife. The Parks Service encourages you to explore the holes you can access, being sure to check for wildlife first! In this section of the canyon, you can get great photos of different rock formations and interesting views of the trail itself.
As we continued along the path, it got more and more narrow until we got to the rings. There are two sets of rings on the trail – the first set has about 6 rungs, and the second set is shorter, with about 4 rungs. We found the first set was a bit easier to manage than the second because there were more natural footholds. Also, the last ring in the second set required a pretty significant reach, which was a bit of a surprise. All in all, the rings weren’t too hard to handle, and we saw lots of kids and adults traverse them.
After some more scrambling across some boulders, we wound up back at the day use parking lot, where we then followed the signs to a side trail to the overlook platform, which provided us with one final look into Banshee Canyon before we hit the road.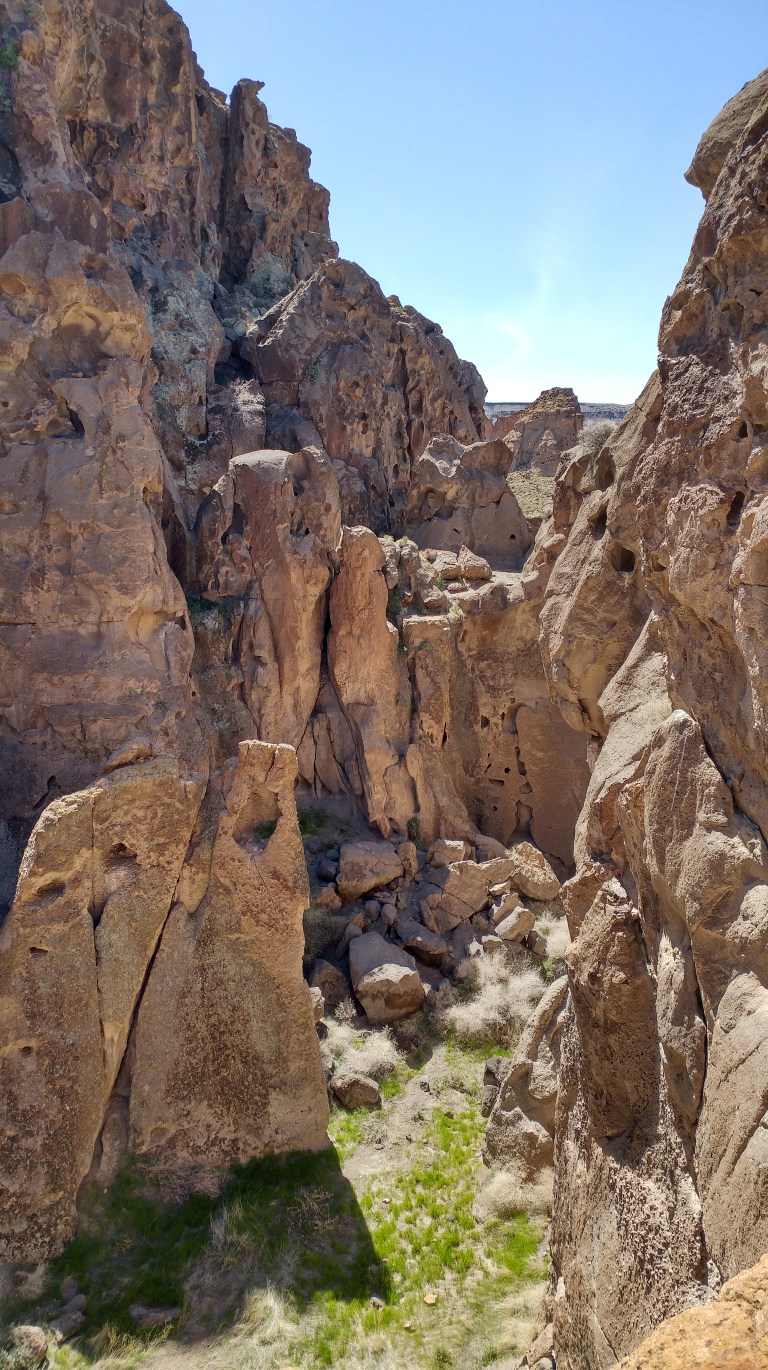
For our final stop in the park, we drove back over to the western side of the park for about an hour to get to Kelso Dunes. By far, this was the most crowded of any of the trailheads we visited during the weekend, but for good reason. The Kelso Dunes is the largest dune field in the Mojave Desert.
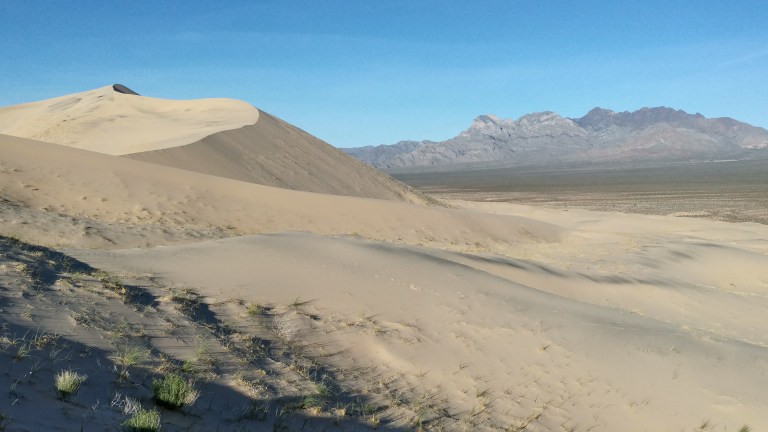
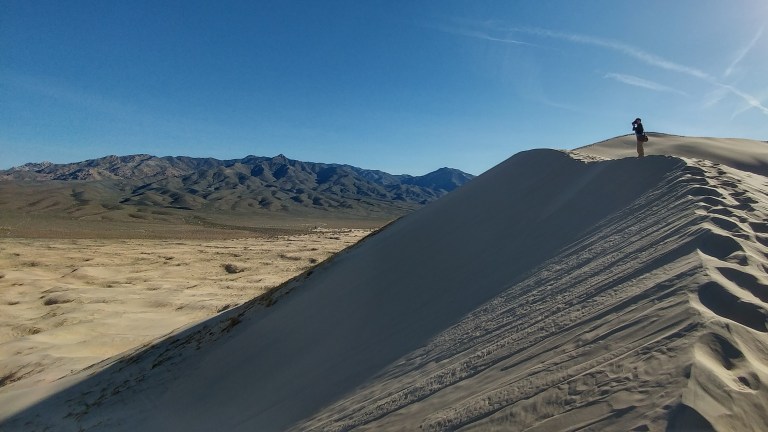
In just 2.7 miles round trip, you can climb to the top of the highest dune and get panoramic views of several mountain ranges, including the Granite Mountains to the south.
Along the way, we were treated to pink primrose blooms, beautiful windswept patterns, and the interesting interplay of light and shadow as the sun began to get low in the sky.
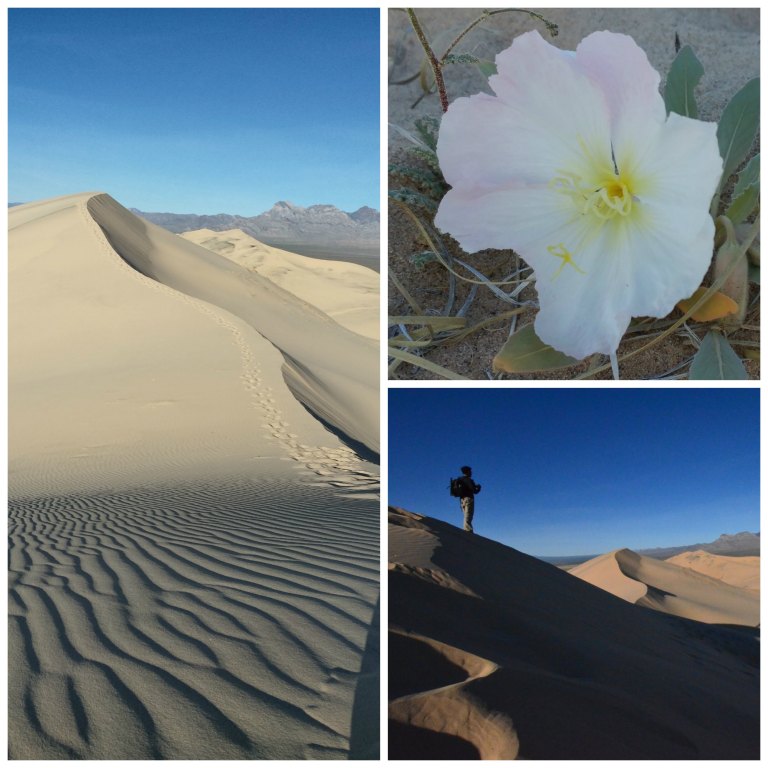
Even though the elevation change is only 423 feet, the soft sand makes the trip very tiring, so be sure to take your time (and plenty of water) as you make this trek! As your feet dig deep into the sand, listen for the sounds of the dunes “singing,” a low hum as your footsteps cause a chain reaction of sand grains sliding over each other. As you’re making the climb, be sure to stay off the delicate vegetation on the trail (the roots of the plants hold the dunes together in some places).

We did this trail in hiking boots, but it was super hard to get the sand out afterwards! In retrospect, running shoes or hiking sandals may have been a better bet. We could imagine this hike could get extremely hot and dry when it is warm, so if you are visiting during a warmer time of year consider doing this hike right around dawn or dusk. Finally, note that there are bathrooms at the trailhead, but one was out of toilet paper when we visited – it never hurts to have an extra roll with you :).
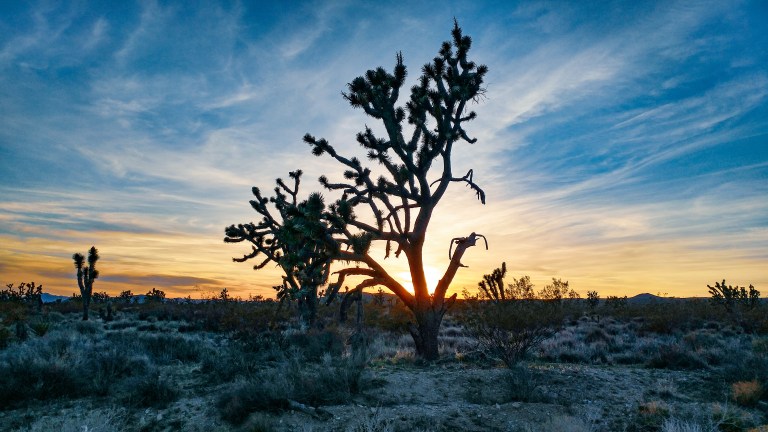
With a very full and memorable weekend behind us, we made our way back to Las Vegas, but not before catching one last amazing sunset behind some of the densest Joshua Tree forests in the world on our way out of the park.
We did a lot on our short visit, but Mojave National Preserve is so vast that there is plenty more to see! What are some of your favorite things to do in the park? Feel free to leave your comments below!

One thought on “Mojave National Preserve”